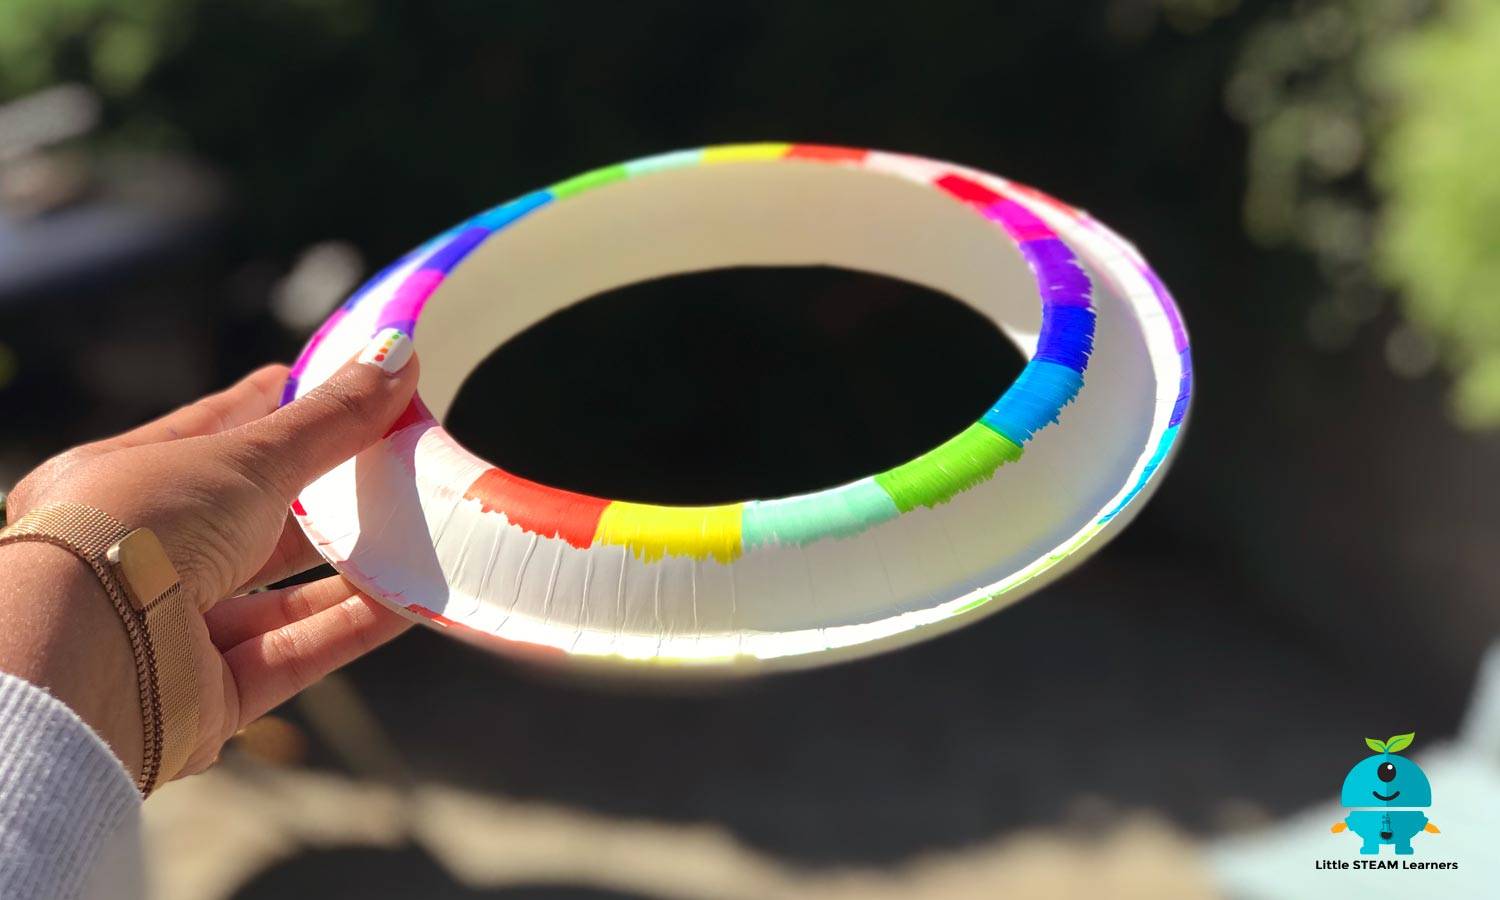
Frisbees are one of our favourite toys to use during the summer. They are great for some play in the sun and perfect for camps as well. However, mother nature does not always give us sunny summer days, sometimes we are showered with some grey and wet days. Rather than being bored and dreary, what if we could bring the classic frisbee indoors? I know what you are thinking! There is no way I am letting my little learner throw a hard flying disc indoors and break all those fragile items. Well, worry no more, because this frisbee is softer than most and it is full of creative colourful fun to brighten the sunny and rainy days.
This paper plate frisbee is a great addition to any season, indoor and outdoor play, just be careful that it does not get wet and don’t let the dog get it. It uses very few supplies and is full of creative fun. Want to add an element of inquiry and STEAM to the activity? No problem! I have got you covered.
Now, let’s get creative!
How to make a paper plate frisbee
What you need:
- Paper plates
- Tape/ glue/ stapler / thread and needle or any binding agent
- Scissors
- Colour pencils or markers
How to:
This activity is pretty simple and can be accommodated for a wide age range. Adult supervision or assistance is highly recommended (as it is for all our activities), but it is especially needed to accommodate the little hands. Watch the video for a quick visual or follow the directions below.
Step 1: Grab a paper plate, and using scissors, poke a hole in the center of your plate. Then cut an “X” at the center of the plate up to the plate’s “circle”.
Step 2: Cut the circle out. This will create a “donut”
Step 3: Repeat steps 1 & 2 with another paper plate.
Step 4: Time to get creative! Colour and decorate the back of the paper plates.
Step 5: Place the paper plates on top of each other. The bottom of the paper plates should be facing out. Bind/stick the plates together using tape, glue, a stapler, or whatever you can think of.
Step 6: Once done, it is time to throw the frisbee around. Throw them to a friend or set up some targets and play some frisbee golf.
Explore further:
Creating the paper plate frisbees on their own are a tonne of fun. However, you can also attach some inquiry and STEAM questions to turn it into a playful learning experience.
Here are a few ways you can do that. Just make sure to change only one variable per frisbee.
- Test different sizes of paper plates.
- Cut different size holes in the paper plates. They can be big, medium, small, or no holes at all.
- Test different binding agents such as glue, tape, stapler, sewing, or paper clips.
- Experiment on how you can make your paper plate frisbee waterproof.
Questions you can ask:
- How did the change affect the paper plate frisbee?
- Which paper plate frisbee flew the furthest? Why?
- How can you improve the frisbee?
By changing only one variable at a time, you are conducting what scientists called a controlled experiment. In a controlled experiment you always have a control sample (your original frisbee) and some variable samples (the different frisbees with one change). This makes comparisons easier and easier to draw conclusions. Scientists and inventors use inquiry and controlled experiment all the time to find out why something is happening and the best way of improving a product.
Who knew creative paper plate frisbees could so much fun and could contain inquiry-based learning for a wide range of ages. We hope you enjoy making these paper plate frisbees as much as we did. Happy playing!

0 Comments